
Addressing the Issue
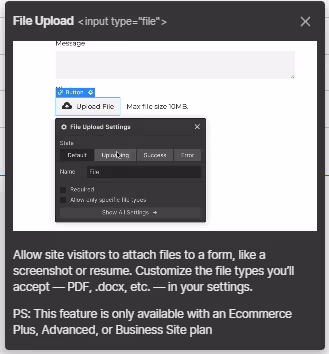
To my knowledge, there isn't a straightforward solution readily available to tackle this problem. Once, while working on my Webflow project, I encountered a challenge where I needed to create a CMS item for each form submission. The form comprised various types of inputs, including text information and photos. Initially, I sought a native input field in Webflow to facilitate photo/file uploads, only to discover that such functionality required a purchase of an Ecommerce Plus, Advanced, or Business site plan.
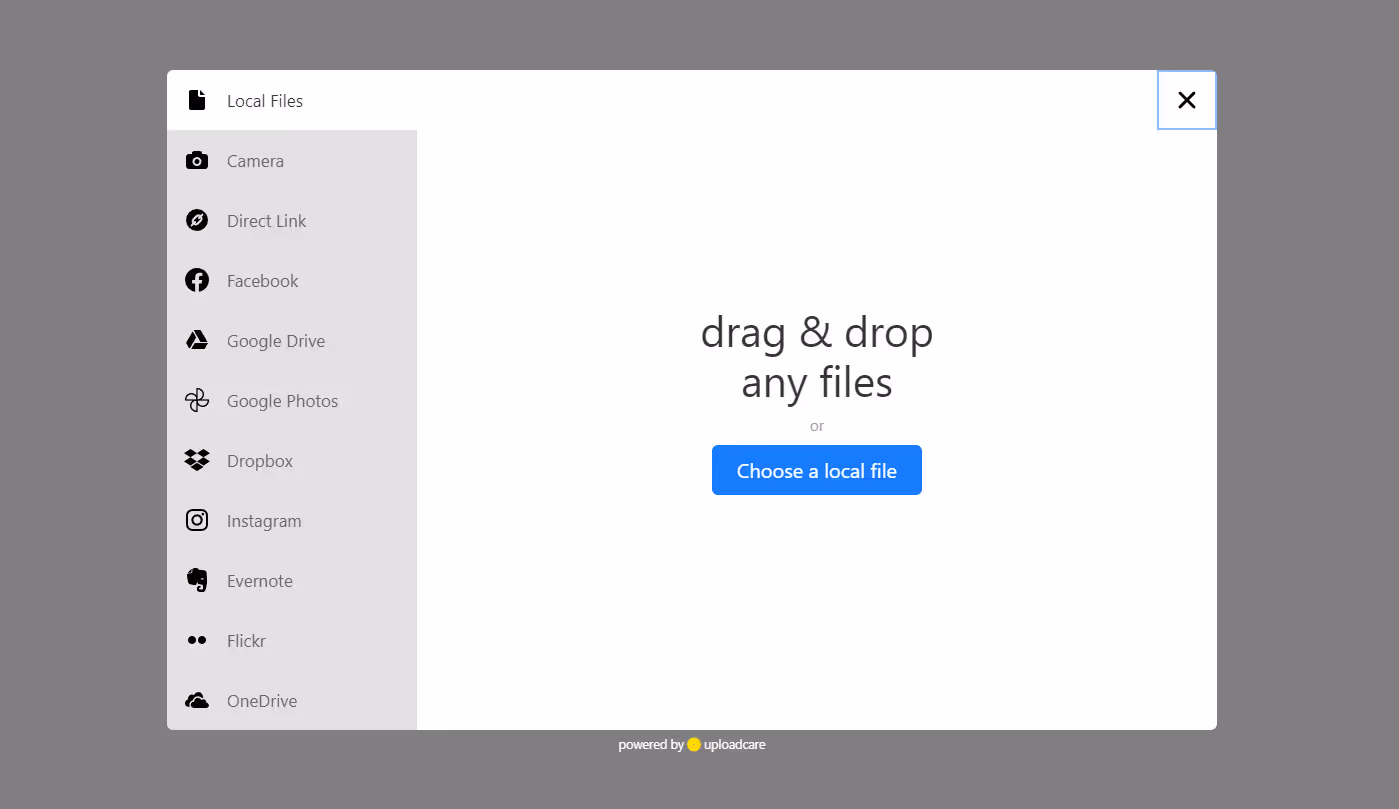
This discovery was disappointing, but I remained convinced that there had to be a workaround. Upon researching how to upload files in a Webflow form without relying on the native file uploader, I stumbled upon a helpful tool called "Uploadcare." Their Low-code guides for Shopify, Webflow, and Marketo presented a solution:
Fortunately, you can embed an advanced Uploading Widget into your Webflow website. Using it is as easy as using the default Webflow File Upload element, but with almost no limits. With Uploadcare, you can upload files up to 5 TB and use more input sources, including Facebook, Instagram, Dropbox, etc.
With this revelation, my initial issue was resolved; I integrated their embed into my form seamlessly, and it functioned perfectly.
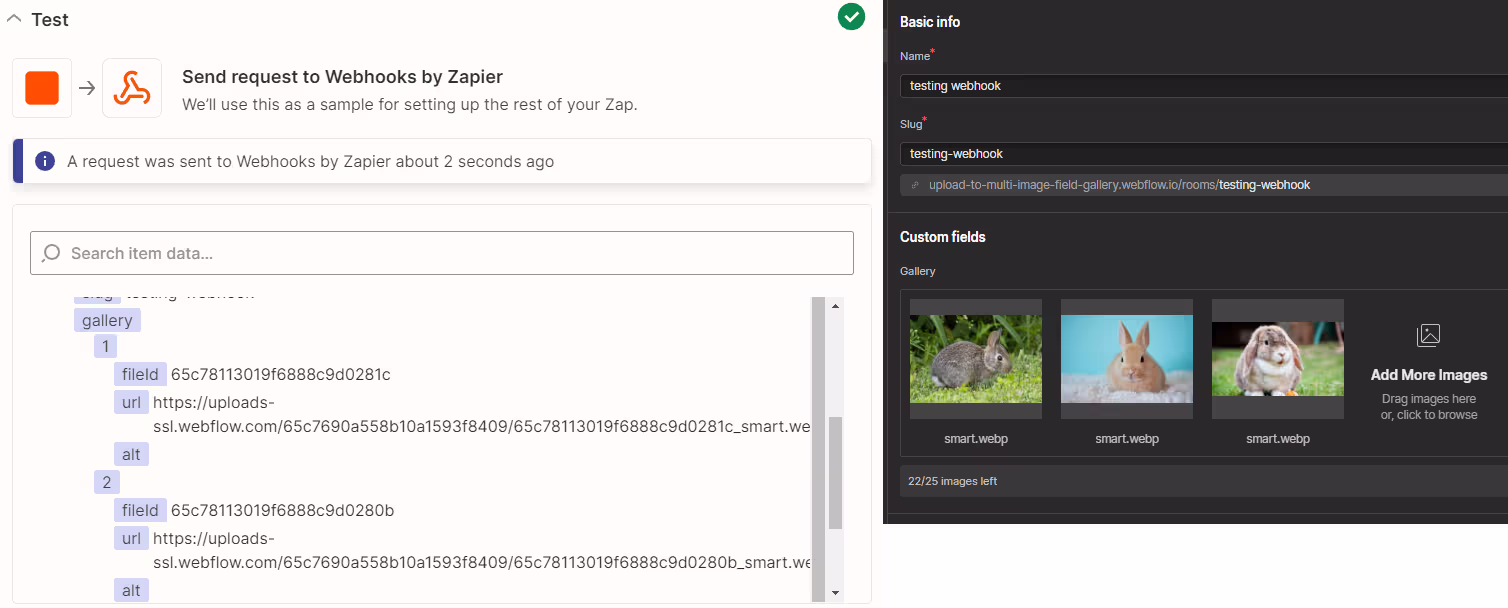
Now, let's revisit the problem we're addressing: we have a form on Webflow, and we need a CMS item created for each form submission. My first thought was to leverage Zapier, our beloved automation tool. I set up a simple Zap, as illustrated in the next image. After testing the zap, the CMS item was successfully created, and the image was uploaded. However, when attempting to upload multiple images—since I had a multi-image field in my CMS setup—I encountered a setback. I had to add a custom attribute to the input field [data-multiple="true"]. Despite these adjustments, upon testing, not a single image was uploaded to my CMS.
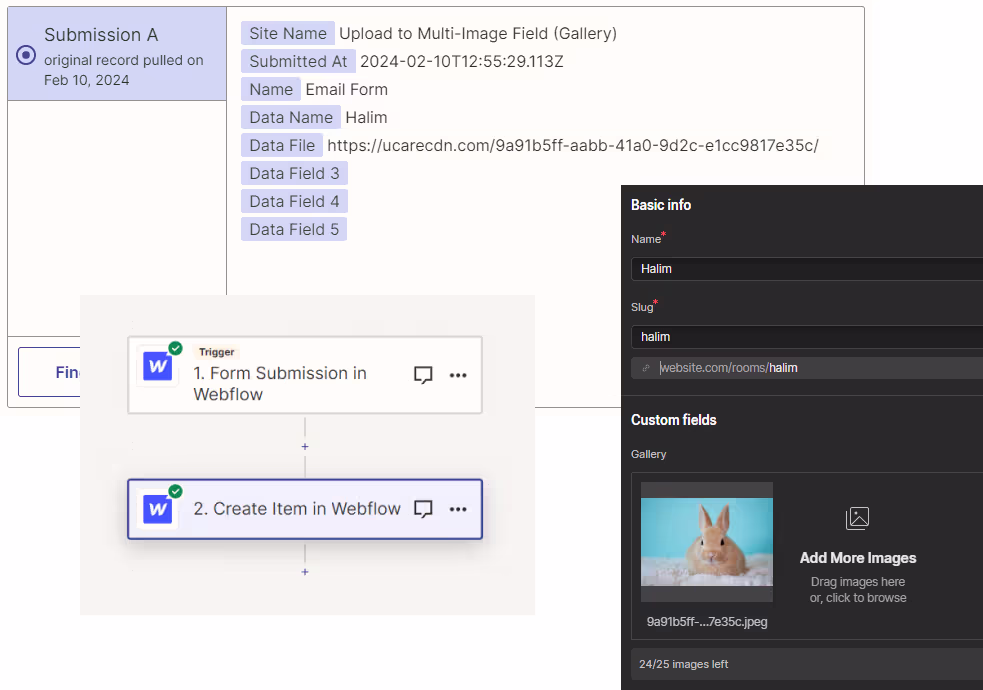
Why? When multiple images are uploaded with Uploadcare, they are grouped or placed into a folder, and the input field contains the value as a single URL, which Webflow fails to recognize as an image source. It may sound complex, but allow me to share the solution that worked for me.

Solution
After numerous trials and errors, I discovered that I had to generate individual image URLs from the group URL using JavaScript and then create an array of URLs to input as the field value passed to Zapier. This was the first step. To utilize this array, I had to set up a custom webhook on Zapier. Using the native action for creating a CMS item wouldn't work!
Here is how the array appears:
Additionally, here is the JavaScript code I used to generate the links. I also included certain parameters in the image URL to optimize and compress the images.
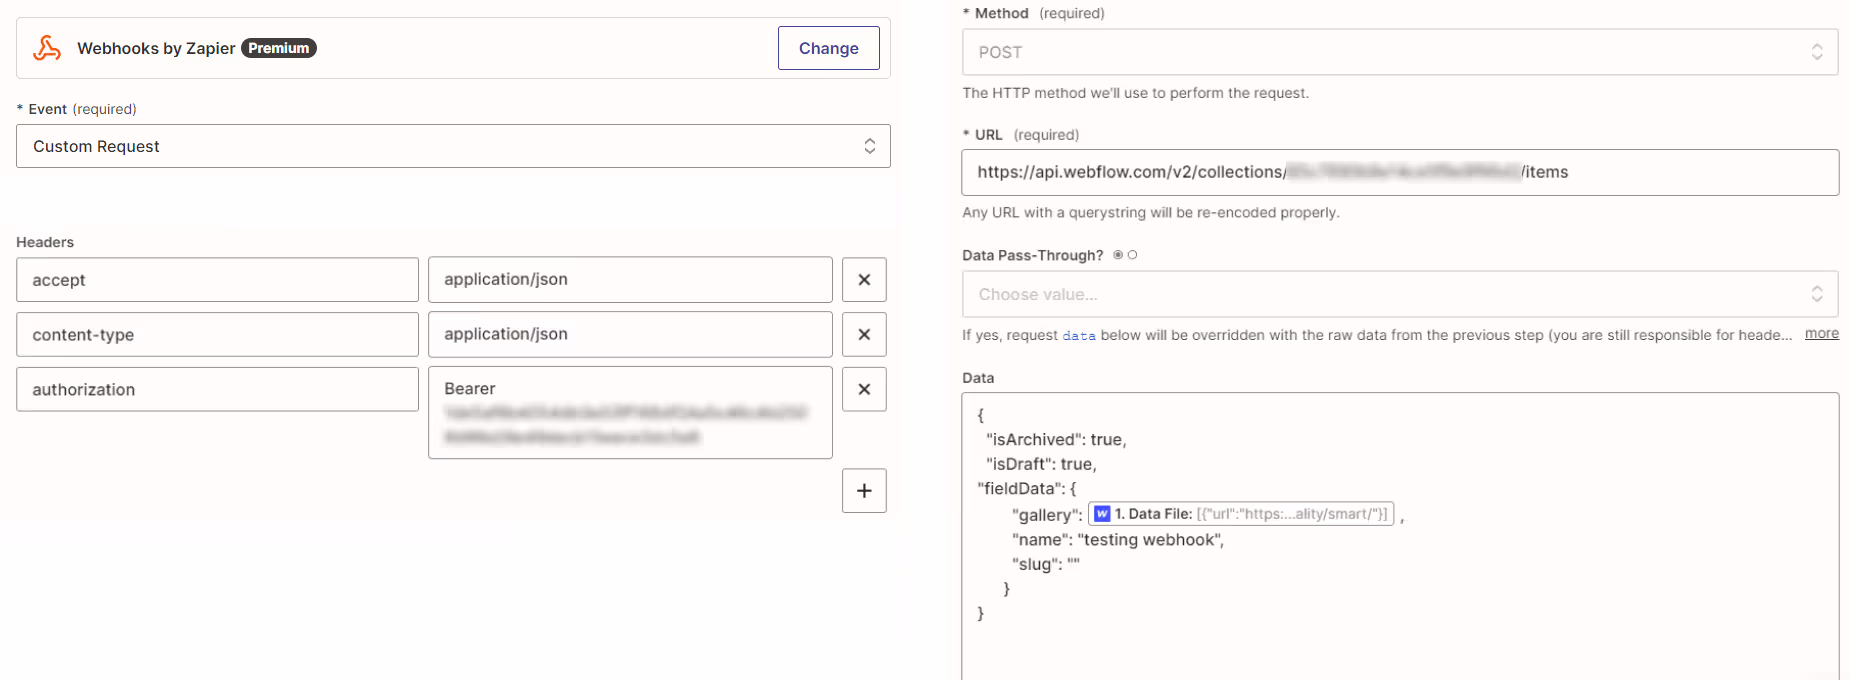
To set up the webhook with type "custom request" on Zapier, you will need to:
- Set the method to POST.
- Obtain your bearer token from Site settings > Apps & integrations tab > API access.
- Authorize on Webflow API Docs using your bearer token.
- Obtain the collection ID from Collection settings in Webflow CMS.
- Get the API URL from Webflow API Docs to use in your webhook.
- Input your raw data and headers.
To sum up, we encountered obstacles integrating file uploads into Webflow forms and automating CMS item creation. Solutions like Uploadcare and custom JavaScript helped us overcome challenges, including managing multiple image uploads and configuring Zapier. In the upcoming image, I'll provide you with the final recipe we used to resolve our issue. Thank you for your support, and may your development endeavors be filled with joy!


