
Everybody knows that most of the projects built on Webflow are marketing websites, and when marketing is mentioned, we always have GTM and GA4 in mind. Every Webflow developer is always asked to put a small snippet/script after the <head> tag in the settings and/or add a measurement ID in the integrations tab.
Whether you know what this is all about or not, it's pretty easy to just put that snippet in and forget about it. The marketing folks will do the rest and take it from here, right? Well, that’s not always the case.
There are always these default events for GTM and GA4, such as page_view, session_start, form_start, form_submit, etc. But what if you have a specific event that you want to watch out for? Or some sort of data that you wish to see on your analytics panel? How would you do this?
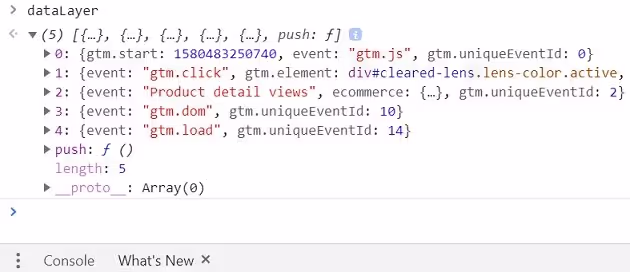
The dataLayer
The dataLayer is a JavaScript array used to collect and store data for use by various marketing and analytics tools, particularly Google Tag Manager (GTM) and Google Analytics. It serves as a structured way to pass information from your website.
Google Tag Manager uses the dataLayer to trigger tags and collect data. When data is pushed to the dataLayer, GTM listens for these changes and uses the data to execute tracking tags configured in GTM.
How to push data to dataLayer?
Pushing data to the dataLayer is straightforward and involves using the push method to add objects containing your desired data.
Steps to Push Data to dataLayer
- Ensure that the dataLayer is initialized before you attempt to push data. This is typically done at the beginning of your HTML document or script.
window.dataLayer = window.dataLayer || [];- Use the push method to add an object containing your data to the dataLayer. This object can include various key-value pairs representing the data you want to track.
window.dataLayer.push({
	'key1': 'value1',
    'key2': 'value2'
});
Example Scenarios
Tracking a Form Submission:
// Assuming userAgeGroup is a variable that holds the user's age group
var userAgeGroup = '25-34';

window.dataLayer.push({
    'event': 'formSubmission',
    'userAgeGroup': userAgeGroup
});
Tracking Page Views:
window.dataLayer.push({
    'event': 'pageView',
    'pagePath': '/home',
    'pageTitle': 'Homepage'
});
E-commerce Transaction:
window.dataLayer.push({
    'event': 'purchase',
    'transactionId': '12345',
    'transactionTotal': 99.99,
    'transactionProducts': [
        {
            'name': 'Product 1',
            'sku': 'P123',
            'price': 49.99,
            'quantity': 1
        },
        {
            'name': 'Product 2',
            'sku': 'P124',
            'price': 50.00,
            'quantity': 1
        }
    ]
});
Custom User Interactions:
window.dataLayer.push({
    'event': 'videoPlay',
    'videoTitle': 'Introduction to Our Product'
});
Google Tag Manager (GTM) Configuration
Let’s assume you have the GTM snippet in your website <head> and that other <noscript> in your website <body>. You also wrote the code already to push certain data to the dataLayer. It’s not over; there has to be some setup in GTM to recognize the data you are pushing and assign it to a variable.
In order to prepare a dataLayer variable on your GTM container and make sure it’s being brought as an event to your GA4 property, you can follow these steps:
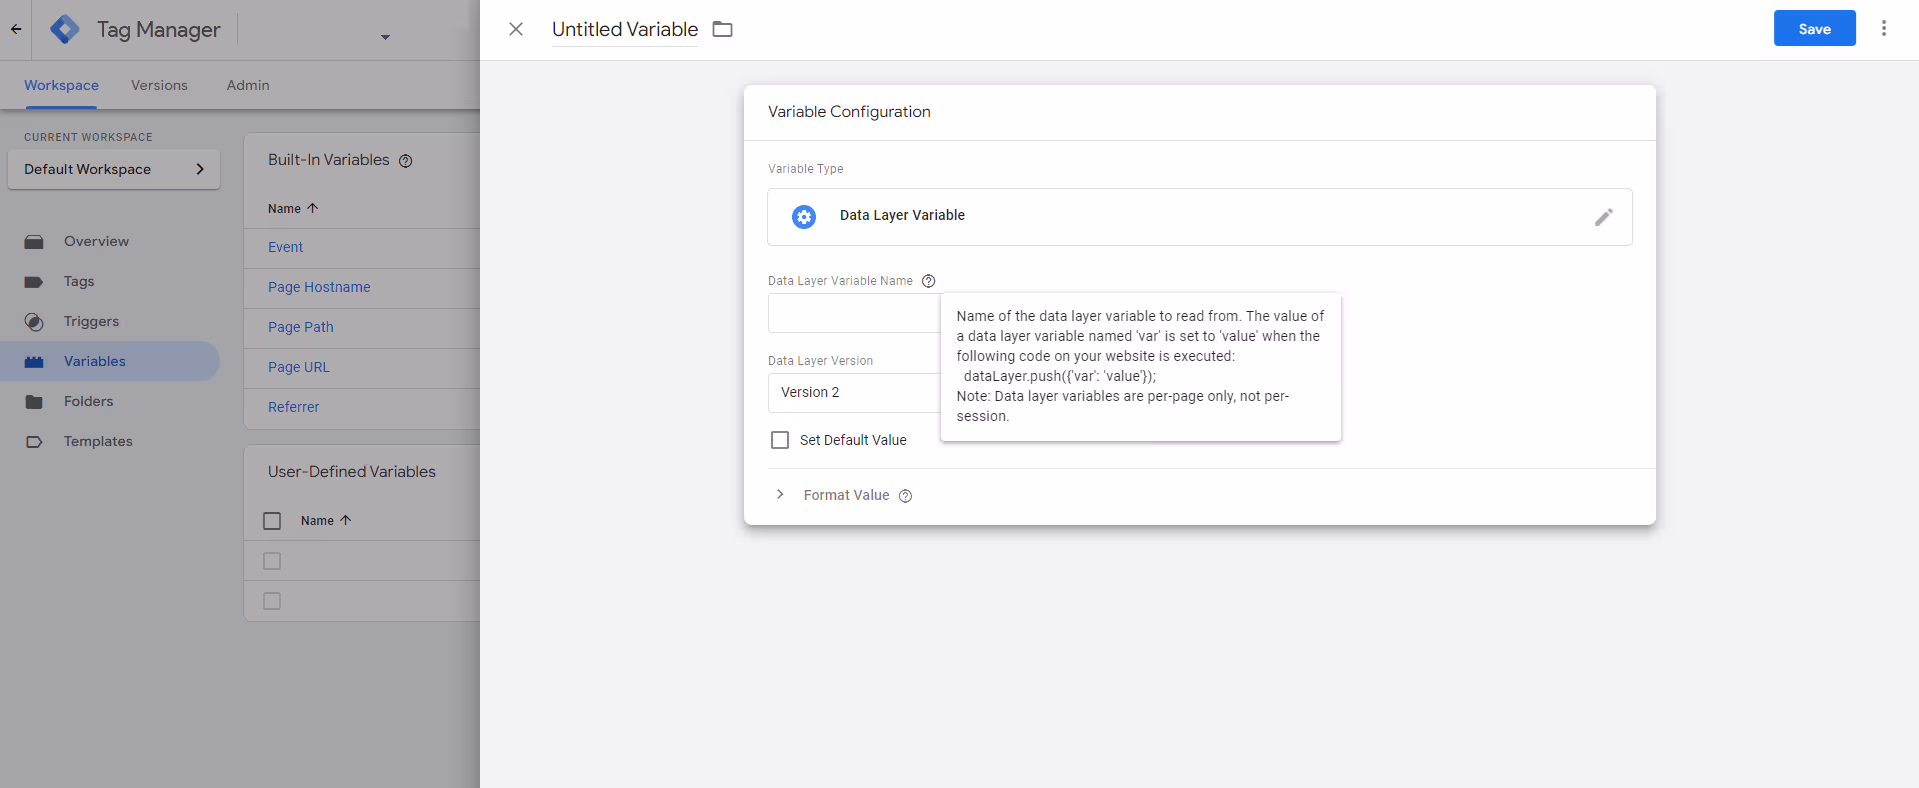
Create a Data Layer Variable:
- Go to GTM > Variables > New > Data Layer Variable.
- Name: any_name
- Data Layer Variable Name: (This should be the event parameter name you have in the dataLayer script)
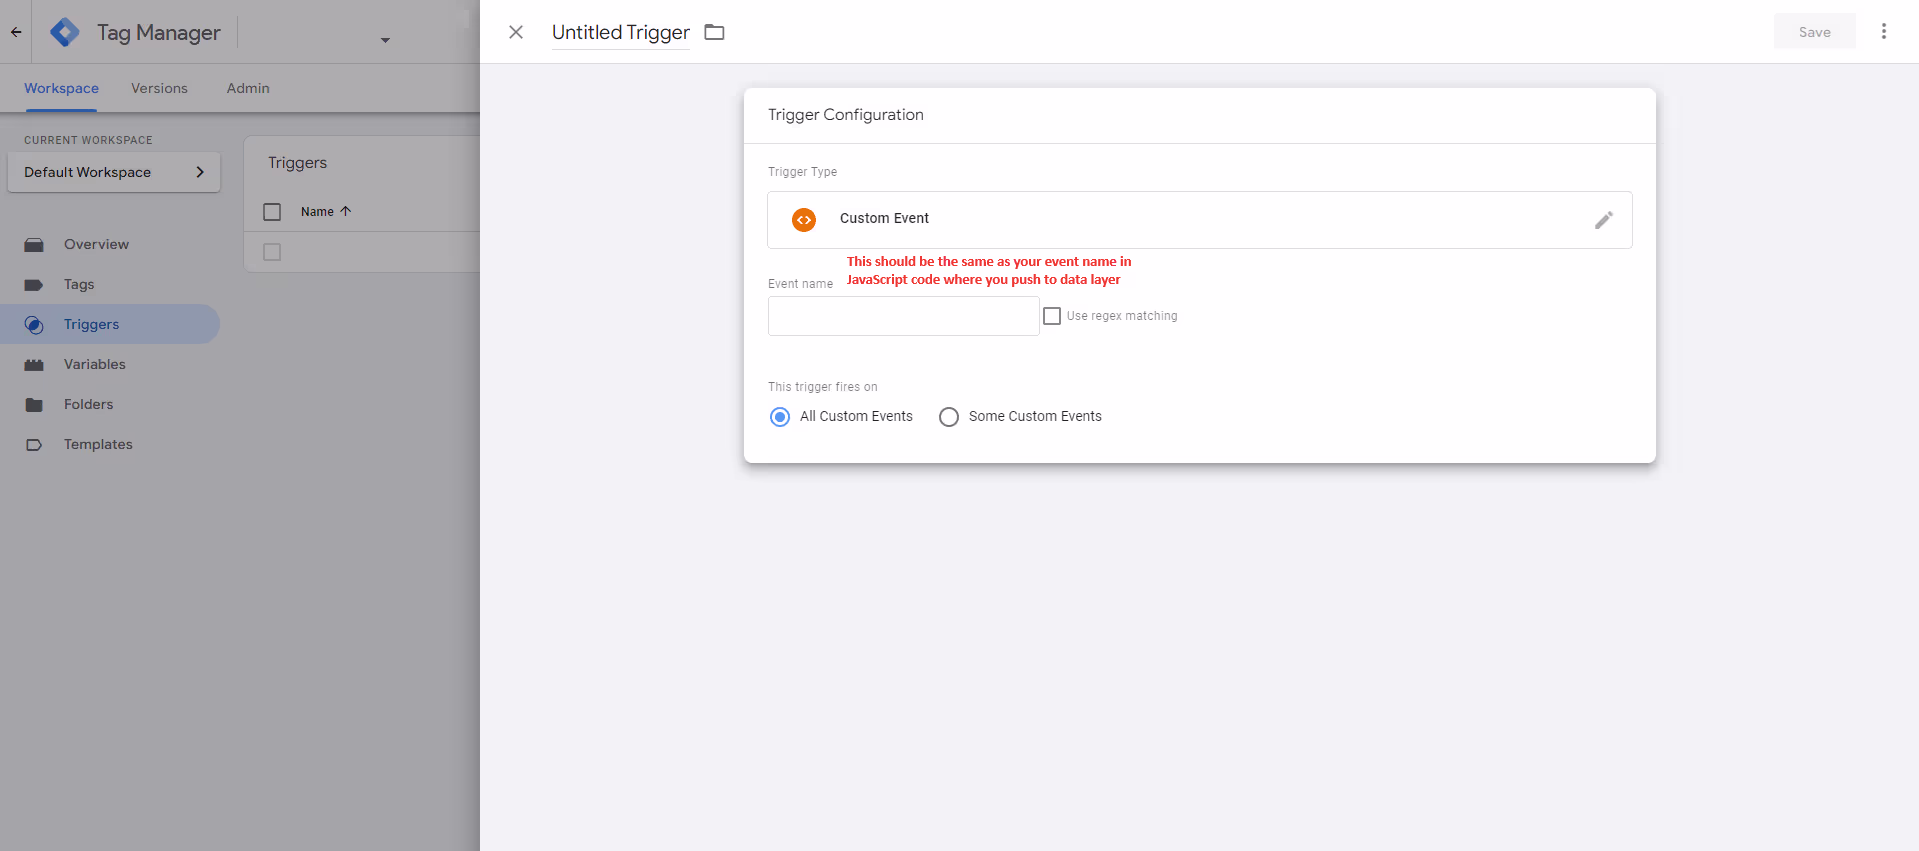
Create a Trigger:
- Go to GTM > Triggers > New > Trigger Configuration > Custom Event.
- Name: Trigger Name.
- Event Name: (this should be the same event name you are using in the dataLayer script).
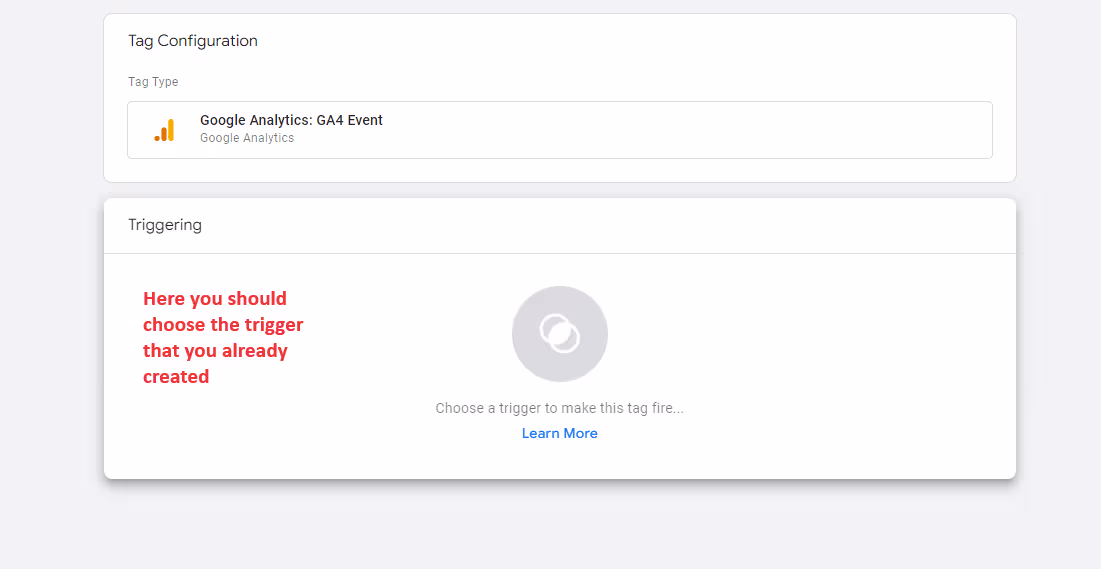
Create a GA4 Event Tag:
- Go to GTM > Tags > New > Tag Configuration > GA4 Event Tag.
- Configuration Tag: Set to your GA4 measurement ID.
- Set event name (This is the event name that will show in your GA4 reports)
- Set event parameters (here you should choose the variable)
- Set the trigger (choose the trigger that you already created)

Publish the GTM Container:
- Publish the GTM container to make the changes live.
In conclusion
Incorporating custom events in Webflow for GTM and GA4 enhances your ability to track specific user interactions and gather detailed insights. By utilizing the dataLayer and configuring Google Tag Manager appropriately, you can capture and analyze a wide range of events that go beyond the default tracking capabilities. This empowers your marketing team to make data-driven decisions and optimize your website’s performance effectively.


